
See this topic to learn how to remove and install a door. Unlock and open the door. Removing a door Hold the door in place, and lift both hinge pins until they lock in the open position so that the door is disengaged. Remove the door from the rack cabinet frame. Install. Before installing your server in a rack cabinet, review the following guidelines: Two or more people are required to install the device in a rack cabinet. Ensure that the room air temperature is below 35°C (95°F). Do not block any air vents; usually 15 cm (6 in. ) of space provides proper airflow. In this comprehensive guide, we will walk you through the step-by-step process to ensure a successful installation and setup of your network cabinet system. Key steps include measuring the installation area, mounting rails, organizing cables, and testing stability. Proper grounding and compliance with safety. Page 3 M3. Click Side Panels (E) into place. To install the Tempered Glass Door (G), locate the side with two pins. With your thumb, pull down on the spring pin and slide it. Complete Assembly Procedure for 9U Wall Mounted Network Cabinet (Double Section) How to assemble a double section wall mounted network cabinet server rack? 1, Insert top and bottom panels into the side frames. And fixed the frame on the front door position with 4 M5*8 self-tapping screws.
[PDF]

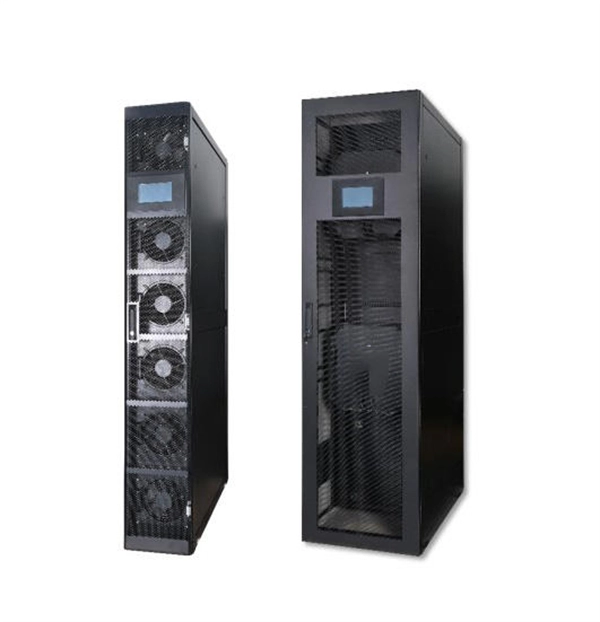
There are several types of outdoor server racks, each tailored to specific environmental and operational needs. The two primary categories based on structural design are seismic and non-seismic racks. Free Standing 19' 32U 600x600mm. Ecoline Server Cabinet Flat Pack RAL 9005 black W/ 4 fans L Type Support Slide Rail, Enclosure Depth=600mm. For outdoor server and network applications, the weatherproof rack cabinet is designed to protect equipment from water, environmental elements, and debris. With front and rear doors, allows easy access for installation and maintenance while the o-ring around each door creates a water resistant seal. We Provide outdoor cabinet range provides single or multi-chamber, temperature controlled secure environment for valuable sensitive communications, electronic & electrical equipment, in a cost effective and space saving manner. Designed to house a variety of communications equipment and incorporated design flexibility to. Check each product page for other buying options. At Sturdx, we provide outdoor cabinets that merge resilience, functionality, and reliability. This guide delves into the features, benefits.
[PDF]
The mounting height of a network rack typically ranges from 24 inches to 84 inches (2 to 7 feet), depending on the equipment and installation requirements. A server rack is more than just a physical frame—it determines how well your rack servers, network switches, PDUs, and storage arrays can be organized, cooled, and maintained. Selecting the right rack size ensures not only compatibility with today's hardware but also room for future expansion. The. Common server rack sizes are 19‑inch width, heights like 42U or 48U, and depths from ~24″ to 48″. Choose size based on equipment type, cooling, space, and future growth. Most IT environments default to 42U, 19-inch width, and 1000–1200 mm depth unless space constraints or special equipment dictate. A rack unit, abbreviated as “U,” is the standard unit of measurement for the height of devices designed for rack mounting. One rack unit equals 1. Important: U describes height only, but a server's real "capabilities" are also determined by chassis depth, internal layout, airflow, rails, power, and expansion (PCIe/risers, NVMe. You'll get precise, vendor-agnostic dimensions for standard server rack sizes—including exact width (19″ internal / 24″ external), height (42U = 73. 5″), depth (24″–48″), and the universal 1U = 1. 75″ rule—plus how to verify usable space, avoid common fitment errors, and select based on equipment.
[PDF]

Bury cables from 12-36 inches (or 30-90 cm) deep. Where plant life, sidewalks, and other utilities already disrupt earth, it's safer to bury at as little as 24 inches or 60 cm, using protective conduits to limit the likelihood of damaged cables by inexperienced maintenance or. Bury cables from 12-36 inches (or 30-90 cm) deep. However, simply hitting this depth isn't enough to guarantee your network survives. Factors like the. Requirements vary based on location, cable type, and local regulations, with depths typically ranging from 18 to 48 inches. Residential areas require depths between 24 and 36 inches for most installations. This protects cables from landscaping activities and minor excavation work. This. The question of how deep to bury fiber optic cable has no single answer, as the required depth changes significantly based on location, environment, and specific application. Industry standards and regulations, such as those often referenced in the National Electrical Code (NEC), establish a. Fiber optic cables are typically buried between 12 and 36 inches (30–90 cm), depending on installation environment, soil conditions, and load requirements. In high-load areas such as roads or backbone routes, burial depth can reach 48 inches (120 cm) or more. This guide provides a comprehensive overview of industry.
[PDF]

A 1U server rack measures exactly 1. 45 mm) in height and fits standard 19-inch racks. For example, a typical full-size rack cage is 42U high, while equipment is typically 1U, 2U, 3U, or 4U high. The rack unit size is based on a standard rack specification as defined in EIA -310. The Eurocard specifies a standard rack unit as the unit of height; it also defines a similar unit. U (rack unit, RU) is a unit of equipment height in a 19" rack. Important: U describes height only, but a server's real "capabilities" are also determined by chassis depth, internal layout, airflow, rails, power, and expansion (PCIe/risers, NVMe. Originally defined by the EIA-310 standard, the rack specifies a front panel width of 19 inches (482. 6 mm), allowing different hardware from various manufacturers to fit in the same enclosure. The unit calculator below can convert rack U's into cm, inches and feet. You'll get the precise, standardized dimensions of a 1U server rack unit — including height (1. 45 mm), width (19″ / 48. This three hole grouping is known as a rack unit (RU) or “U”.
[PDF]

The system cover is off or incorrectly installed. The intrusion switch might be triggered or not working. In this scenario at least one fan or fan assembly (contains two fans) is either damaged (connector, fan blade, fan blade frame), missing or failed. Check the front LCD or system event log to. What do the BMC logs say? Does the server overheat? Are the fans just off because it's not under load? what kind of server do you have, give a spec sheet. Server fans maintain critical airflow to prevent component overheating and system failures. (Adapted from hardware diagnostic methodologies in service docs) 💡 *Pro Tip: Replacing bearings extends fan life by 2-3 years at 20% of new fan cost* (Cost data from “Dell & HPE Server Repair Services. we've got 3 Dell PowerEdge R6615 with an AMD Epyc 9174F in it and the fans are doing something weird. Most of the time they are at 8-9k RPM and fairly quiet. But every minute or 2 they are revving up to full speed (~ 24k) or half speed (~ 13k) and then back down. From failed capacitors to deep grime hiding in your rotor shaft — I show you how to diagnose each fault step-by-step using. Server racks can get hot fast. When the heat isn't managed well, it can slow down your servers, cause shutdowns, or even damage your equipment. Over time, this.
[PDF]
This post provides you with guidance steps and pictures on how to replace a computer power supply, after the PC power supply unit (PSU) failed. Changing your computer's power supply is a simple enough process that anyone can do, once you know how. This guide will teach you how to replace/change the power supply unit in your computer, step by step. Write down important information from the top or bottom of the power supply, such as the Model Number, Serial Number and specifications (e., voltage and watts). Ensure you are familiar with ESD. "My Computer Will Not Turn On" - Troubleshooting PC Power Supply | Computers and Coffee Thanks For Watching ! Please Like and Subscribe For More Content Like This :). more Audio tracks for some languages were automatically generated. Learn more Thanks For Watching ! Please Like and Subscribe For. Sometimes when you upgrade your PC, you will find that current power supply isn't powerful enough to support your new system. Whatever the reason, doing it right will make the process easier and ensure you have a model that will stand the test of time and deliver uninterrupted power to your computer. Before replacing your PSU, ensure you.
[PDF]

There are two electrical terminals, X and Y, where your cables must be connected. In this case, X refers to Black while Y refers to White. You need to connect X and Y with hot and neutral wires respectively. This is the most essential step. Each hot wire is 120 to 240 volts from the. Fortunately, anyone that understands color codes and electrical wiring, in general, can use X and Y wires and terminals. Circuits typically run on three wires. The hot wire brings power from the panel. In a standard setup, X and Y terminals typically correspond to specific colors: black for X and red for Y in 240V systems. Knowing these codes helps you properly connect circuits, ensuring. The standard electrical wire color code mandated by the National Electrical Code (NEC) is a critical safety system for licensed electricians. For typical building AC circuits (commonly up to 600 volts nominal), the NEC specifies identification rules for grounded conductors (neutral), requirements. Wires in electrical typically have color-coded labels., the National Electrical Code (NEC) defines required colors for neutral and grounding conductors, while hot wire colors often follow industry convention rather than strict rules. The table below gives a quick snapshot of the most common electrical wire colors you can see at home.
[PDF]

And fixed the frame on the front door position with 4 M5*8 self-tapping screws. 2, Use 16 M8*12 inner hex round screws and M8 flange nut for fixing the top & bottom panels into two side frames. 4, Insert back panel. Follow the instructions in this section to remove and install the side panels. Insert the key that comes with the rack cabinet into the key hole on the side panel, and turn it clockwise to unlock. If an IT cabinet is not equipped with side panels and placed in the end position, side panels need to be installed to ensure that the outer side of an end cabinet has side panels. Mark the mounting hole positions for the end cabinet based on the mounting holes in the cabinet side panel, and install. Complete Assembly Procesure for 9U Wall Mounted Network Cabinet (Single Section) How to assemble a wall-mounted network cabinet? 1, Insert top and bottom panel into the side frames. more How to assemble a wall-mounted. Installing and setting up a network cabinet system correctly is essential for maintaining an efficient and organized network infrastructure. In this comprehensive guide, we will walk you through the step-by-step process to ensure a successful installation and setup of your network cabinet system. Page 3 M3. 5 Attach Back Panel (H) to the rear of the cabinet frame,using M3. Click Side Panels (E) into place. To install the Tempered Glass Door (G), locate the side with two pins. Insert the fixed pin into door hinge hole. Pre – installation.
[PDF]
This guide provides essential best practices for server rack setup and organization, covering steps for effective installation, cable management, standards compliance, power distribution, cooling methods, and security measures. By following these practices, you can enhance your network's. An in wall network cabinet is a special type of enclosure that fits inside your wall. Unlike traditional floor-standing racks, these cabinets are recessed, which means they don't take up valuable floor space. They're designed to hold important networking equipment such as switches, patch panels. There are various options available, ranging from simple wall-mounted enclosures to larger floor-standing cabinets. Consider the amount of equipment you have and the future expansion needs when choosing the size of the cabinet. It should have enough space to accommodate your modem, router, network. Whether you're setting up a new office or streamlining an existing network, understanding the importance, types, and usage of network cabinets is crucial. In this comprehensive guide, we'll explore everything you need to know about network cabinets, transforming chaos into order in your network. Today, manufacturers are designing data equipment rated at 75W and 150W per square foot, and even higher because server vendors are introducing equipment as small as 1U in height-particularly with servers aimed at the Internet Service Provider (ISP) market.
[PDF]
This section includes the specifications for constructing and building out of Telecommunications Equipment Rooms (MDF/IDFs) to be used for supporting telecommunications and other special systems. Organize and store your small parts with these modular storage cabinets. Quantum's interlocking storage cabinets have the unique ability to interlock horizontally and vertically allowing you to customize your storage needs and maximize your storage space. Predrilled holes on the back side of cabinet allow for wall mounting. Cabinets are made from. View or download Catalog PDF for this category. Find out about our bin systems and interlocking storage cabinets qic series. The QSC-48S all-welded bin cabinet features 48" wide design, a total of 137 bins and three adjustable shelves. Click on the image (s) below to zoom [+] You have no items in your.
[PDF]

These by-laws may be cited as the Electrical Wiring By-Laws. Despite the abolition of the Tonga Electric Power Board in 2008, By-Laws made under the authority of the TEPB Act remain in full force and effect [TEPB Repeal Act 2007, section 2(2)(b)] and are policed by the Electricity Commission. Accordingly the public safety oversight regime in respect of. To be able to connect to Tonga Power Limited's grid, there are a few steps you will have to follow depending on which type of account relates to you. A new connection to our grid requires you to complete a few steps before we are able to connect your power. ) shall apply to all electrical installations connected or intended to be connected with any source from which. The overall approach for implementing a power distribution system: design the distribution system based on screen power consumption, on-site construction requirements, and the loads carried by each distribution cabinet. Calculate the maximum power of the full screen. Select a distribution cabinet. SPC Geoscience, Energy and. 3] 2007 Revised Edition Made by the Tonga Electric Power Board under section 63 of the Tonga Electric Power Board Act and continued in force under section 2 (2) of Act 12 of 2007.
[PDF]

Learn how to wire a frequency converter (VFD) for start and stop control using an electric pressure gauge in this detailed tutorial. It is used to ensure that the panel is wired correctly and safely, and to troubleshoot any problems that may occur. Water pump control. Notes or instructions that make the job easier and ensure safe operation. 1 General description Control CUE is a series of complete control cabinets with a builtin Grundfos CUE frequency converter and all necessary electrical components. Sections 1-7 provide the information necessary to be able to install and start up the products in a safe way. Output filters Thanks to the startup guide in the CUE, the installer can quickly Operating modes set central parameters and put the CUE into operation. This. UNINTENDED START. When the frequency converter i erminal 18 open). To prevent unintended motor start: press ut sing the product. Improper use of the product can cause personal injury and damage to property, and may to the equipment. This includes any modification to the equipment or use of.
[PDF]
